8 Best Ways How to Stick Photos in a Photo Album
Oct 11, 2025
If decorating brings you joy and you find beauty in the little things, creating a Classic Photo Album is more than just keeping pictures — it’s building your own gallery of memories. You care about how each page looks, how photos fit together, and how every turn of the page feels.

Making a Classic Photo Album isn’t just about attaching pictures; it’s about designing a story — your story. With the right materials and a little patience, you can become the designer of your own collection of memories. It takes time, yes, but the result is worth every minute — a one-of-a-kind album filled with moments that look and feel exactly how you want them to.
Why It Matters to Stick Photos Properly?
Sticking printed photos into an album sounds simple, but doing it the right way can make a huge difference in how your memories look — and how long they last. If you’ve ever opened an old album where pictures have yellowed, or stuck together, or peeled away, you already know why it matters.

When it comes to sticking photos in an album, there’s no single “right” way. Each method has its own look and level of permanence. Here’s a breakdown of the 8 Best Ways How to Stick Photos in a Photo Album with their pros and cons — so you can choose the one that fits your creative vision best.
1. Photo Corners — for elegant design
Photo corners are elegant, timeless, and gentle on your pictures. Attach small adhesive corners to your album page and slide your photo neatly into them — no glue ever touches the photos. This method keeps your photos fully protected and makes it easy to rearrange or replace photos later.
Do You want Transparent photo corners?


Transparent photo corners are perfect for those who want to showcase their photos without distractions. Their minimalist design gives classic photo albums a sleek and modern feel that suits any style. Their easy application and almost invisible look make them an elegant solution. We prefer this method in our photo albums because it doesn’t distract from the photograph itself.
Or Do You Want Colored Photo Corners?

Colored or patterned photo corners are a wonderful way to add character and personality to your albums. They bring a touch of nostalgia and charm, making each page feel more creative and lively. Whether you choose bold colors for a playful look or subtle patterns for a vintage vibe, these corners can transform a simple album into a unique expression of style.
Look below — that’s my husband’s mom in the baby photos!

Pros:
- No adhesive on the photo itself
- Keeping pictures fully protected and undamaged
- Easy to replace pictures
- Transparent corners keep focus on the photo
- Easy to remove photos anytime without tearing or residue.
- Perfect for archival use, preserving the original condition of valuable or sentimental photos.
Cons:
- Takes more time to align perfectly
- Photos may slip slightly if the album moves
- Not suitable for very thick photos
- Requires careful alignment to ensure photos sit straight on the page.
- Corners can peel off over time if not firmly pressed onto a clean surface.
2. Photo Glue — for a Strong Finish

Photo-safe glue is a classic for a reason. It creates a strong, lasting bond that feels clean and professional. Apply a few tiny dots or a thin layer to the back of the photo and spread it evenly with a soft brush or sponge to avoid wrinkles and clumps. Works well on thick or matte paper.
Be patient — let the glue dry completely before closing the album so the pages don’t stick together. When choosing adhesive, go for Acid-Free or Archival Photo Glue — both are photo-safe, but archival glue offers an even higher level of long-term stability. These glues won’t yellow your photos or damage the paper. We don’t usually use liquid glue in our photo albums, but if you prefer it, we recommend trying Lineco Neutral pH Adhesive — some of our friends use it for their own photo albums and really like it.
Cons:
- Hard to reposition once the photo is glued
- Can wrinkle or warping thin photos if too much glue is used
- Risk of glue seepage or visibility through the photo if applied unevenly
3. Glue Stick — for kids and beginners

If you prefer something quick and tidy, a photo-safe glue stick makes the process almost effortless. Just twist, glide, and press — no mess, no spills, no stress. The adhesive spreads evenly, dries quickly, and allows slight repositioning before it fully dries. It gives you a few precious seconds to adjust the photo before it sets. It’s ideal for kids, beginners, or anyone creating a fun, casual photo book.
From our own experience, we can really recommend this glue stick — it’s great quality, gentle on photos, and has the most lovely almond scent. Non-toxic and safe for children. You can check it out here: Coccoina Glue Tin.
This metode doesn’t leave visible marks or stains. Acid-free formula keeps photos safe from yellowing or deterioration.
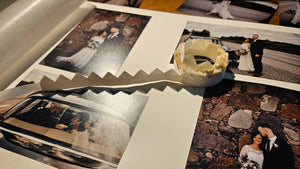
4. Decorative Tape — for a Creative Touch

If you love a bit of flair, washi tape is your creative playground. Use it to frame your photos, decorate corners, or create playful borders that match your theme. From florals to metallics, minimalist neutrals to bold travel prints — there’s a washi tape for every story.
The best part? It’s removable and repositionable, which means you can experiment without fear. Just press it gently and don’t stretch it too tightly, or it might lift later.

Decorative tape gives your photo album that handmade, scrapbook-style charm — one that feels personal and alive. Perfect for themed photo albums, travel journals, or when creativity are part of the fun.
Cons:
- Not ideal for long-term preservation
- May lose stickiness in heat or humidity
- Visible edges change the look of the photo
- Some tapes can peel or curl if not pressed firmly or stored properly.
5. Double-Sided Tape — for Quick Results

When you want instant, no-fuss results, double-sided tape or adhesive squares is the way to go. Cut small strips or use pre-cut squares, place them on the back of your photo, press down, and you’re done — no drying time needed, so you can close or handle the album immediately, but remember press the photo gently from the center outward to avoid bubbles or creases.
Quick, strong, and tidy — ideal for when you want clean results with minimal effort. It’s especially great for pages that need to look smooth and flat, like professional presentations or gift albums. The adhesion is strong, so placement has to be precise. Use photo-safe or archival-quality adhesive dots for best results. May not adhere well to textured or fabric-covered pages.
6. Stickers — for a Playful Design

Photo Stickers bring personality to your photo album. Whether it’s hearts, stars, flowers, or travel icons, they help set the mood and tell small visual stories. Use them to highlight key moments, add captions, or bring playful energy to your pages. For children’s photo albums, celebration scrapbooks, or themed photo books, they make the experience interactive.
Just remember — balance is key. Too many stickers can distract from the photos themselves. But remember, stickers are not archival — may peel or stain photos over time. Choose acid-free, photo-safe designs whenever possible to prevent staining or fading over time.
7. Transparent Adhesive Film — for a Professional Look
If you’re aiming for a sleek, polished finish, transparent mounting sheets are your best friend. They cover each photo with a clear film that seals and protects it from dust, fingerprints, and humidity.
To apply, place the photo where you want it, then slowly lower the adhesive film over it. Smooth it out from the center toward the edges using a soft cloth to remove air bubbles.
This method gives your album a professional, gallery-like look — the kind you see in design portfolios or high-end coffee-table books. It takes care and patience, but the result is smooth and long-lasting.
Cons:
- Hard to remove once sealed — any mistakes are hard to correct.
- Risk of trapping air bubbles or dust under the film during application
- Not ideal for textured paper or glossy prints
- Requires careful handling
8. Combination Method — mix textures and styles
Don’t feel like you need to choose just one method. Some of the most creative photo albums come from mixing styles. Try combining photo corners with washi tape borders for a modern-vintage look, or use glue for main photos and stickers for accents. You can even switch techniques from page to page — the variety makes your album feel dynamic and personal.
Comparison Table
| Method | Pros | Cons | Best For |
| Photo Glue | Strong, lasting | Hard to remove | Permanent albums |
| Glue Stick | Easy clean | Weaker hold | DIY or kids’ albums |
| Decorative Tape | Fun, removable | Not archival | Creative albums |
| Transparent Corners | Safe, clean | Time-consuming | Family archives |
| Colored Corners | Stylish | Photos may shift | Scrapbooks |
| Double-Sided Tape | Quick, tidy | Permanent | Gift albums |
| Stickers | Decorative | Not archival | Kids / themed albums |
| Adhesive Film | Professional look | Not removable | Portfolios |
| Combo Method | Flexible | Needs planning | Modern albums |
Each of these methods gives you a chance to express your personality. Whether you prefer clean lines, colorful details, or a minimalist layout — your album becomes your physical canvas. Play with different materials, mix techniques, and experiment with layouts. It might take time, but the result will be something truly special — a one-of-a-kind photo album designed by you, filled with your favorite memories.
Final Thoughts
Creating a Classical Photo Album isn’t just about glue — it’s about honoring your memories. Every page captures a feeling, a moment, a piece of your story. When you use safe materials and a bit of patience, you create something that lasts beyond trends and technology.
Whether it’s your first DIY photo album or a cherished family heirloom, handle every page with care — because it holds a part of your life. Your hands, your creativity, your story — that’s what makes your album truly yours.
Ready to Start Your Own Album?

Every printed photos deserves a beautiful home. Begin your story with our Madelavi Photo Album, crafted with premium, acid-free pages to preserve your memories safely and beautifully.